Ontario Home Economics Association
  • Home
  • About OHEA
    • What is a P.H.Ec.
    • How To Become a P.H.Ec.
    • Membership Benefits
    • Board of Directors
    • Contact Us
  • News
    • Cookbooks >
      • The Vegetarian's Complete Quinoa Cookbook
      • P.H.Ec. Authors
      • Homegrown
    • Media >
      • OHEA Highlights
      • Care for the Caregiver
      • Links/Resources
      • Videos
  • Branch Associations
    • THEA
    • Branch News
    • Affiliated Associations
    • Student Branches
  • Blog
  • Resources
    • Food Literacy
    • Resources
  • OHEA COURSE
  • Join Us
    • Students
    • Categories of Membership
    • Privacy Statement
    • Awards and Scholarships
  • Members
    • Membership Renewal
    • Member News & Announcements
    • Mentorship Program
    • AGM
    • Newsletters
    • Jobs

Tomato Babies

9/13/2018

0 Comments

 
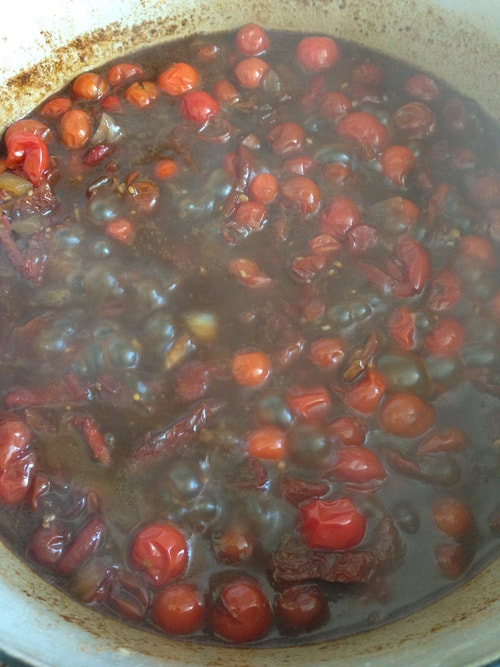
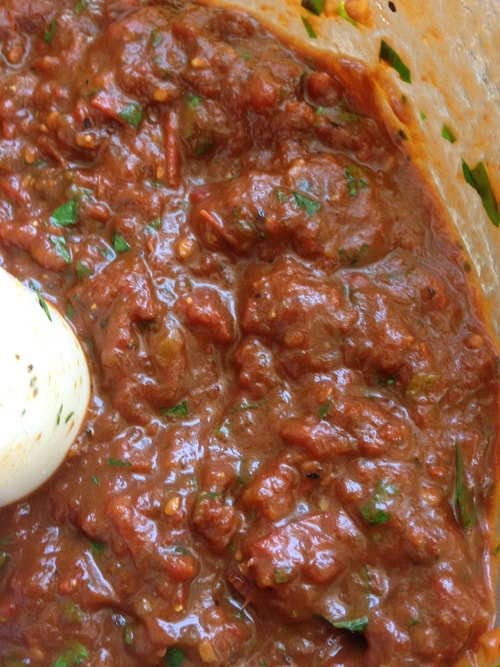
By: Andrea Gaudet of the Half-Assed Hobbyist

Originally posted on September 19, 2016 on the Half-Assed Hobbyist. 
Bright red tomatoes on cutting board
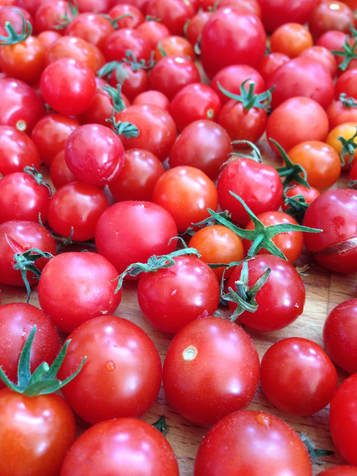
This whole gardening year I have had high hopes that I would have enough tomatoes to make this savoury tomato jam. With the devastating falling over of my giant tomato plants, I thought for sure I would be waiting till next year to achieve this dream. But. My plants had other ideas.
​
I managed to collect enough for two batches of a savoury tomato jam that was an office favourite at the test kitchen I worked for back in AB. Essentially its the most fancy ketchup analog you'll ever eat. I love it on toast, warmed up on sandwiches, or even by the spoonful. Haha. ;)
Savoury Tomato Jam

In order to can this recipe, I needed to add an acidifier. I chose vinegar so the result is a tangier jam than the original recipe. I would however keep this jam refrigerated and eat it within 2-3 months. More for quality than safety. Also. If you are planning to can this recipe, get your water bath canner sterilizing jars during the simmering stage of the jam. That way there is a smooth transition from cooking to canning. 

Makes ~2 cups (500 mL).
2 tbsp (30 mL) oil
1 cup (250 mL) white onion, chopped
1 tbsp (15 mL) minced garlic (2-4 cloves)
2 cups (500 mL) cherry tomatoes
1/2 cup (125 mL) chopped drained oil-packed dried tomatoes, patted dry
1/2 cup (125 mL) chopped drained canned roasted red peppers, patted dry
1/2 cup (125 mL) tomato juice
1/2 cup (125 mL) balsamic vinegar
1/2 cup (125 mL) white vinegar
2 tbsp (30 mL) fancy molasses
1/4 cup (60 mL) chopped fresh parsley
2 tsp (10 mL) fresh thyme leaves, chopped
1/2 tsp (2.5 mL) salt
1/4 tsp (1 mL) pepper

Directions
  1. In a large dutch oven, with a lid, heat oil over medium heat. Add onion and cook, stirring, for 5 minutes or until onion becomes clear. Add garlic. Cook for 2 more minutes, or until garlic is fragrant. 
  2. Add tomatoes through molasses. Stir together and bring to a boil over high heat. Reduce heat to low and simmer for 20 minutes, covered, stirring occasionally. Remove the lid and continue to simmer for 30 minutes or until the mixture has thickened and most of the liquid has gone. Remove from heat.
  3. Using an emersion blender or food processor, process the jam using an on/off pulse until just about smooth. Don't over pulse the jam, you want a bit of texture left. Add the parsley, thyme, salt and pepper. Pulse just to combine. 
  4. To Can: I did a good post on how to can safely here! It's for fruit jam but the essentials are there. Below is the version for this recipe:
    1. Sterilize All The Things. As mention above, it's best to get this part going during the simmering stage of the jam. Thoroughly wash all jars and screwbands and lids and utensils (jar tongs; wooden spoon; ladle; jar funnel; plastic knife or spoon) in hot soapy water. Rinse clean of all soap residue. Fill the waterbath canner with water (and ~2 TBSP [30 mL] vinegar) and bring the canner to boil. Place all your jars evenly spaced in the canner and boil the jars for at least 10 minutes. (This will sterilize the jars.) Dry all screwbands and utensils and lay them out so they're easily accessible. Also, set a flat bottomed sauce pan filled with water on the stove. Put in the snap lids. Then, from a kettle filled of boiled water, add enough hot water to make the water in the sauce pan warm. This will soften the wax ring on the lids helping the jars seal completely.
    2. Prep All the Ingredients. Having now simmered and food processed the jam, you are ready for canning! ALSO. Make sure your canner is boiling hot! You won't have time to bring it back to a boil after you've started your jam. I also usually have a kettle of boiling water going as well in case I need to top up the canner during the process. 
    3. Start Canning. Now for the fast hot mess that is jam making. Bring your jam back to boil. (Since it is thick it will bubble more that boil. Watch out for white shirts as it may spit at you!) Now that your jam has been sufficiently lava-ed, remove it from the heat. Using the jar tongs, remove a sterilized jar from the boiling canner and empty the water in it back into the canner. Place the jar on your clean counter next to the jam pot. Place the jar funnel on the jar and ladle the jam smoothly up to the recommended head space marker (for my recipe I used a 1/4 inch headspace). Remove the funnel, remove any air bubbles from the jar by running a plastic utensil around the sides of the jar, and wipe the rim with a damp paper towel or clean damp cloth. Place a warmed lid on top. Place a screwband on the jar, then grasp the jar with the jar tongs. Tighten the screwband to ONLY fingertip tight. This literally means using your finger tips only, tighten the screwband until there is enough resistance that it stops. Then, keeping the jar level, lift it up and place it back into the canner. Repeat!
    4. Finish Canning. Now that all your jam has been put in jars in your canner, top up the water with more boiling water from the kettle, if need be (I usually like about 2 inches of water above my cans, if I can get it). Depending on your altitude, you'll need to adjust the time you process the jars. But it's a standard 10 minutes across the board, no matter what. (For Alberta, add an extra 5 minutes.) With the canner lid on, process the jam in the boiling waterbath. After the time is done, remove the jars with the tongs, lifting them straight out of the canner (NO tipping to get water off the top!). Set them down to cool in an out of the way space. From this point on, till they're completely cooled, No Touching! Resist the urge to poke them! As they cool, you'll hear the popping sounds of the snap lids sealing. Even after this has happened, No Touchy! It's a waiting game now. If you did it right, you'll have delicious shelf-stable jam to look forwards. 
    5. Enjoy! Let the jars cool completely. This will take up to 8 hours. After they've cooled, check that all the jars have sealed. The snap lids should be divoted inwards and you should be unable to pry them off with your fingers.** Ta Da!!! Done!

Keep in mind! This recipe is not shelf stable. (Well. It may be that it's shelf stable but as I have not tested it long term I don't recommend that it sits out.) Instead, keep it in you fridge and eat it before 2-3 months. Also. **If the lid did not seal do not fret! The jam is still good to eat! It just needs to be eaten first and within 2-3 days.
Andrea Gaudet

Andrea Gaudet is an Ottawa-based PHEc passionate about nutrition education and recipe development. Check out her blog at www.thehalfassedhobbyist.com for her services and a glimpse into her many hobbies. 
0 Comments

Your comment will be posted after it is approved.


Leave a Reply.


    Picture

    The Ontario Home Economics Association, a self-regulating body of professional Home Economists, promotes high professional standards among its members so that they may assist families and individuals to achieve and maintain a desirable quality of life.

    Categories

    All
    ACHES
    Agriculture
    Award
    Board Of Directors
    Branch Associations
    Conference
    Contest
    Family/Relationships
    Finances
    Food Literacy
    Foods And Nutrition
    Homegrown
    Interviews
    Mentorship
    New PHEcs
    Nutrition
    Obituary
    Outreach
    Professional Development
    Recipes
    Sewing
    Sponsors
    Student Member
    Sustainability
    Through The Years

    Archives

    March 2023
    February 2023
    January 2023
    October 2022
    August 2022
    July 2022
    June 2022
    May 2022
    April 2022
    March 2022
    February 2022
    January 2022
    December 2021
    November 2021
    October 2021
    August 2021
    May 2020
    April 2020
    July 2019
    June 2019
    May 2019
    April 2019
    March 2019
    February 2019
    January 2019
    December 2018
    November 2018
    October 2018
    September 2018
    August 2018
    July 2018
    June 2018
    May 2018
    April 2018
    March 2018
    February 2018
    January 2018
    December 2017
    November 2017
    October 2017
    September 2017
    August 2017
    July 2017
    June 2017
    May 2017
    April 2017
    March 2017
    February 2017
    January 2017
    December 2016
    November 2016
    October 2016
    September 2016
    August 2016
    July 2016
    June 2016
    May 2016
    April 2016
    March 2016
    January 2016
    December 2015
    October 2015
    August 2015
    April 2015
    July 2014
    May 2014
    February 2014
    January 2014
    October 2013
    August 2013
    June 2013
    May 2013
    April 2013
    March 2013
    February 2013
    January 2013
    December 2012

    RSS Feed

About OHEA
Job Postings
                                 Subscribe to our mailing list
News and Events
Food Literacy in the News
                        Unsubscribe ​from our mailing list
Blog
Links/Resources
                                                           Contact Us
Copyright © 2023 Ontario Home Economics Association (OHEA). All Rights Reserved.
  • Home
  • About OHEA
    • What is a P.H.Ec.
    • How To Become a P.H.Ec.
    • Membership Benefits
    • Board of Directors
    • Contact Us
  • News
    • Cookbooks >
      • The Vegetarian's Complete Quinoa Cookbook
      • P.H.Ec. Authors
      • Homegrown
    • Media >
      • OHEA Highlights
      • Care for the Caregiver
      • Links/Resources
      • Videos
  • Branch Associations
    • THEA
    • Branch News
    • Affiliated Associations
    • Student Branches
  • Blog
  • Resources
    • Food Literacy
    • Resources
  • OHEA COURSE
  • Join Us
    • Students
    • Categories of Membership
    • Privacy Statement
    • Awards and Scholarships
  • Members
    • Membership Renewal
    • Member News & Announcements
    • Mentorship Program
    • AGM
    • Newsletters
    • Jobs