|
Cherry Pie Oat Squares By Sandra Venneri, P.H.Ec. This vegan dessert uses nature’s natural flavours and sweetness to highlight the Canadian cherry taste with a mingling of maple 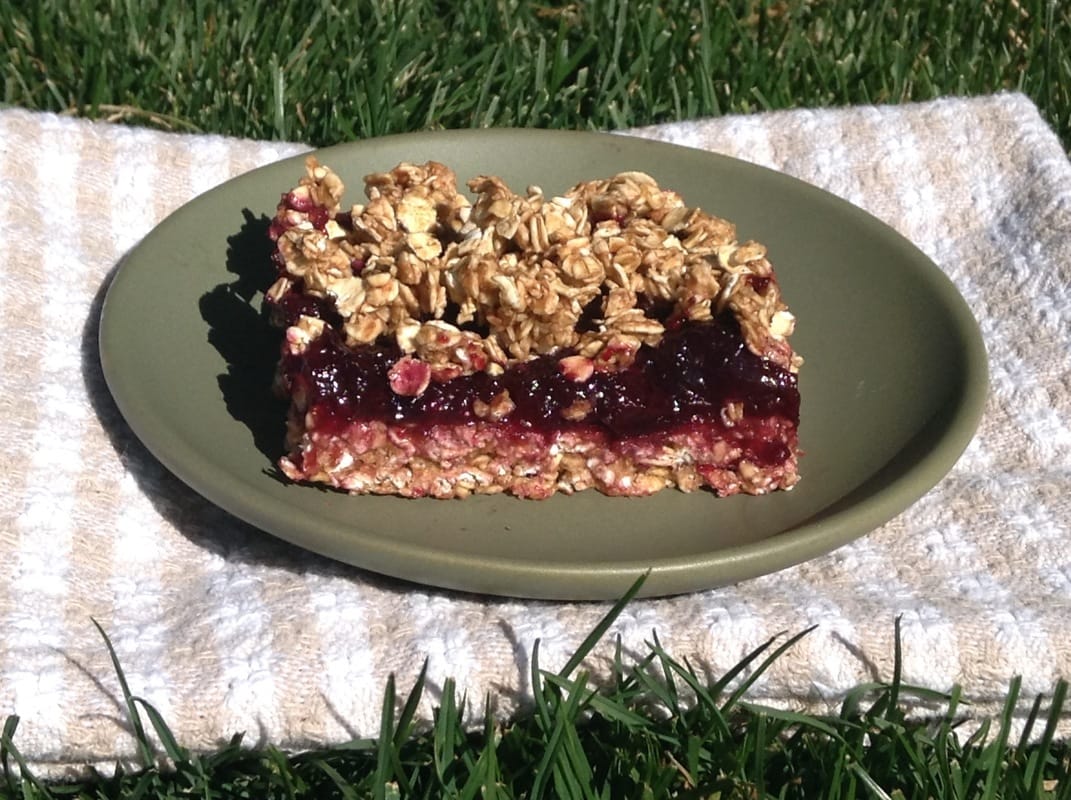
0 Comments
Grandma's Holiday Prize Cookies By Heather Grebler, P.H.Ec. Yield: 10-11 dozen Preparation Time: 20 minutes Cooking Time: 2 hours (approx. 10-12 minutes per sheet of cookies) Total Time: 2.5 hours Ingredients:
For more delicious recipes such as this, please visit Heather's blog: www.houseonthehill.ca. You can also follow Heather on Twitter @HouseontheHill_ and on Instagram  Empire Cookies By Pat Moynihan-Morris, P.H.Ec. Pat is a recipe developer and freelance Home Economist. You can follower here on Instagram to see all her delicious recipes here. INGREDIENTS 1/2 cup unsalted butter, softened 1/4 cup shortening 1 cup sugar 2 eggs 1 tsp. vanilla 2-1/4 cups all-purpose flour 1-1/2 tsp. baking powder 1/2tsp.salt FILLING /FROSTING 1/2 cup raspberry jam 1-1/2 cups icing sugar 1/8 tsp almond extract 1-1/2 - 2 Tbsp. hot water Candied cherries METHOD Heat oven to 350 F Cream butter, shortening, sugar, eggs, and vanilla in large bowl on medium speed with electric mixer until light and creamy. Combine flour, baking powder and salt . Add to creamed mixture , beating on low speed until blended. Refrigerate for 1 hour. Roll dough on lightly floured surface to 1/8 inch thickness. Cut into 2 inch rounds. Re-roll leftover pieces. Place on parchment lined cookie sheets. Bake for 6 to 9 minutes or until lightly browned around edges. Filling: spread underside of half of the cookie with jam. Top with remaining cookies to form sandwiches. Combine icing sugar, almond extract and enough hot water to make a thin frosting. Frost tops of cookies. Decorate with small pieces of cherry. (makes about 3-1/2 dozen cookies) 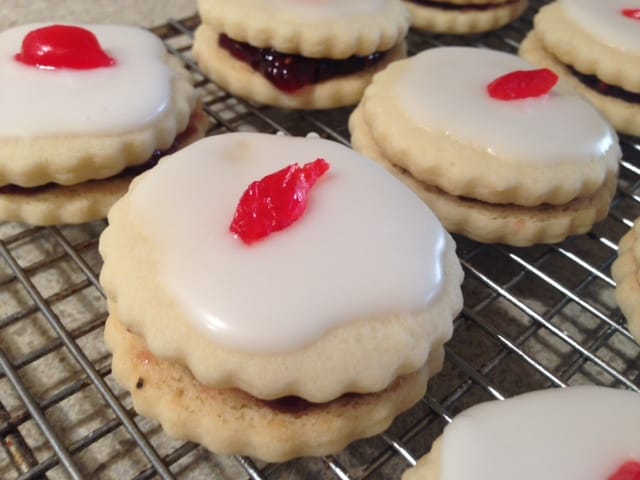 Oatmeal Cranberry Flax Cookies
By Eileen Stanbury, P.H.Ec., OHEA Administrator Sneak in some healthy ingredients during the holidays with these tasty and festive Oatmeal Cranberry Flax cookies. Your kids will love them too! INGREDIENTS ¼ c (50 mL) all purpose flour ½ tsp (2 mL) salt ¾ c (175 mL) Red Fife wheat flour* ½ tsp (2 mL) baking soda 1 cup (250 mL) quick oats 1 tbsp (15 mL) ground flax seed 2/3 c (150 mL) brown sugar ½ cup (125 mL) canola based margarine 2 tbsp (30 mL) honey 1 egg ½ tsp (2 mL) vanilla 2/3 c (150 mL) dried cranberries METHOD Preheat Oven to 350˚F or 175˚C. Sift together flour, salt, soda in a bowl and stir in quick oats and flax seed. In a separate bowl, cream together sugar & margarine. Add honey, egg and vanilla to the creamed mixture and beat in until smooth. Add dry ingredients, and mix. Add dried cranberries and mix well. Drop cookies 1tbsp/15 mL on a cookie sheet lined with parchment paper and bake 9 to 11 minutes or until light brown. Makes 2-1/2 to 3 dozen. Note: Any wholegrain flour can be used instead of the Red Fife Wheat flour. If desired, ½ cup semi sweet chocolate chips can be substituted for the dried cranberries. * Red Fife is one of the first 'variety' and 'farmer' identified food crops sold in Canada and originated in the Peterborough area. Recently it has become popular in Canadian artisan breads. Stollen Pinwheel Cookies By Andrea Leisner, P.H.Ec. These pinwheel holiday cookies are reminiscent of the classic German Stollen, dried fruit and almond paste and memories of winters past. (Note: These cookies need to freeze completely before baking, so allow for 6 hours in the freezer or let them freeze over night.) Filling Ingredients: 1 1/4 cup almond flour 3/4 cup sliced almonds 1/4 cup granulated sugar 2 large egg whites 1 tsp salt Dough Ingredients: 1 1/2 cups granulated sugar 1 cup butter, softened 2 large eggs 1 large egg yolk 2 2/3 cups flour, sifted 1 cup almond flour 2 tsp baking powder 1 1/4 tsp salt 1/3 cup dried strawberries or cherries, chopped 1/4 cup dried pineapple, chopped 1/2 cup chopped candied citrus peel 1 tsp vanilla extract Finishing ingredients: 3/4 cup butter, melted ~2 cups confectioners’ sugar (for dusting) Making the filling: 1) In an electric mixer, add the flour, almond slices, sugar, egg whites, and salt. 2) Beat on medium speed until combined, about 1 1/2 minutes. (The almond slices will break apart.) Set aside. Making the dough: 1) Using an electric mixer, beat sugar and butter on medium speed until light and fluffy, about 2 minutes. 2) Add eggs and egg yolk. Beat on low until just incorporated. 3) Sift in the flours, baking powder and salt. Measure in strawberries, pineapple, candied citrus peel and vanilla. Mix on low just combined. Don’t overmix. Assembling the cookies: 1) Using a rimmed rectangular baking sheet (approx. 9X13’) lined with parchment paper, spread the dough out evenly to about 1/2 inch thick. 2) Use a second piece of parchment overtop the dough to smooth any bumps flat. Leave covered. 3) Refrigerate the dough until it’s firm but still pliable, about 30 minutes. 4) Remove the top layer of parchment. Spread the almond filling evenly over the top the entire surface of the dough. (If needed, wet your fingers and use them to spread the filling to the edges.) 5) Starting with the long side of the dough, roll the dough tightly around the filling. Peel back the remaining piece of parchment as you roll. 6) Pinch the long seam closed along the cookie log. Wrap the dough in parchment and freeze until completely solid, about 6 hours or overnight. Baking the cookies: 1) Preheat the oven to 350’F. 2) Line 2 baking sheets (or more) with parchment. 3) Unwrap the cookie log and transfer to a cutting board. 4) Using a sharp knife, cut log in half and replace one half back into the freezer to keep it solid. 5) Slice the dough into 1/4 inch medallions. Space the cookies about an inch apart. (If the dough begins to become soft again, replace in the freezer to firm up.) 6) Brush cookies with melted butter. 7) Bake until golden brown, about 12 to 14 minutes. (Rotate baking sheets once during baking if using more than 2 sheets in one oven.) 8) After baking, brush the still warm cookies with melted butter and dust with confectioners’ sugar. 9) Let cool on baking sheets for 15 minutes. Then transfer to a rack to cool completely. Store cookies in an airtight container. Makes approx. 54 cookies. Original recipe source: Fine Cooking Magazine Andrea is recipe developer and blogger. Follow her @thevajra on Twitter, and her blog: thehalfassedhobbyist.com 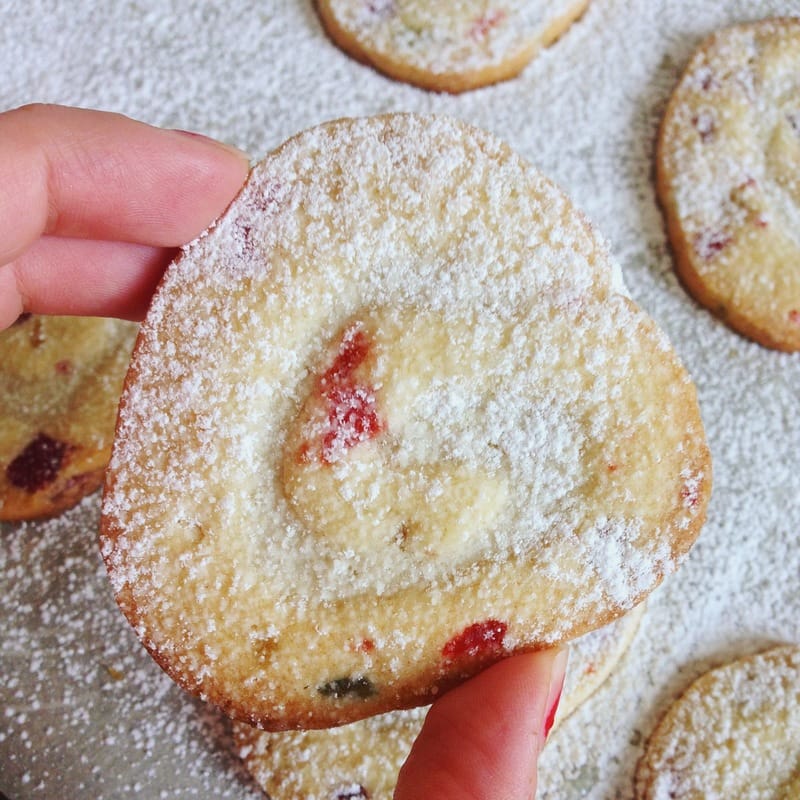 Get started on holiday preparations by making delicious and colourful jars of a cranberry relish or chutney. Cranberries celebrate the season with their rich colour and bright taste and are easily turned into a welcome hostess gift or a treat for a special friend. Quick Apple Cranberry Chutney has a rich mellow taste and is perfect to serve with chicken or pork. The Cranberry Rum Relish is a splendid accompaniment to the holiday bird. Both of these require less than 15 minutes cooking time. A dollop of chutney on a cracker spread with cream cheese makes a superb appetizer requiring little preparation. And a bit of either the chutney or relish stirred into yogurt becomes a delicious low-fat veggie dip. Home preserving is easy and can be done safely if proper processing procedures and times are followed. It is essential to use mason-type jars. These jars are widely available in125 mL (1/2 cup), 236mL, 250 mL (1 cup) and 500 mL (2 cups) sizes which are perfect for creating small gifts. They often come with lids decorated in a holiday motif or, to personalize your gift, cut a circle of holiday fabric and tie it to the lid with ribbon and a card. One short evening spent now will provide you with several tasty gifts ready for holiday giving. QUICK APPLE CRANBERRY CHUTNEY 2 cups (500 mL) chopped cranberries 1 cup (250mL) finely chopped apple 1/2 cup (125mL) each: finely chopped red onion and sweet red pepper 1/2 cup (125 mL) cider vinegar 2 cloves garlic, minced 1 tbsp (15 mL) finely chopped gingerroot 1/2 cup (125 mL) packed brown sugar 1/4 tsp (1 mL) each: ground cumin and salt 1/8 tsp (0.5 mL) each: freshly ground pepper and hot pepper flakes 1. Combine cranberries, apple, onion, red pepper, vinegar, garlic and gingerroot in a stainless steel or enamel saucepan. Bring to a boil over high heat, reduce heat and boil gently, covered, for 5 minutes or until cranberries pop. 2. Add sugar, cumin, salt, pepper and hot pepper flakes. Cook for 5 minutes or until thickened. 3. Process 10 minutes for half-pint (250 mL) jars and 15 minutes for pint (500 mL) jars as directed below, or store in refrigerator up to 3 weeks. Makes 2 cups (500 mL). CRANBERRY RUM RELISH 1/3 cup (75mL) dark rum 1/4 cup (50 mL) finely chopped shallots Grated rind of 1 orange 3 cups (750 mL) fresh or frozen cranberries 1 cup (250 mL) granulated sugar 1/2 tsp (2 mL) freshly ground pepper 1. Combine rum, shallots and orange rind in a medium saucepan. Bring to a boil over high heat, reduce heat and simmer for a few minutes until rum has reduced and mixture is a syrupy glaze. 2. Add cranberries and sugar. Stirring constantly, continue to cook until cranberries pop and sugar is dissolved. Remove from heat and stir in pepper. 3. Process for 10 minutes for half-pint (250 mL) jars and 15 minutes for pint (500 mL) jars as directed below, or store in refrigerator up to 3 weeks. Makes 2 cups (500 mL) TO PROCESS CHUTNEY OR RELISH: 1. Before beginning recipe, partially fill a boiling water canner with hot water. Place required number of clean mason jars in canner and bring water to a boil. Meanwhile, place snap lids in hot water according to lid manufacturer’s directions. 2. When recipe is finished, remove jars from canner and ladle chutney or relish into jars to within 1/2-inch (1 cm) of top rim (head space ). Wipe jar rim to remove any stickiness. Centre snap lid on jar; apply screw band just until fingertip tight. Place jars in canner and adjust water level to cover jars by 1-2 inches (2.5-5 cm). Cover canner and return water to boil over high heat. Begin timing when water returns to a boil and process for amount of time as directed in recipe. Water should be kept at a steady boil during processing time. 3. At end of processing time, remove jars from canner and cool for 24 hours. Check jar seals to ensure the lids turn downward indicating a tight seal. (Any jars with unsealed lids may be kept in the refrigerator for up to three weeks.) With a properly sealed snap lid, the screw ring can be safely removed, dried and replaced to prevent rusting during storage. Label jars and store in a cool, dark place ready for holiday giving. Recipes adapted from The Complete Book of Year-Round Small-Batch Preserving by Ellie Topp, P.H.Ec. and Margaret Howard, RD, P.H.Ec. (Firefly 2001). Ellie Topp is a Professional Home Economist and certified culinary professional. She is co-author of several cookbooks, including Preserving Made Easy, The Complete Book of Year-Round Small Batch Preserving and Savoury Wisdom: Delicious Recipes for Two. 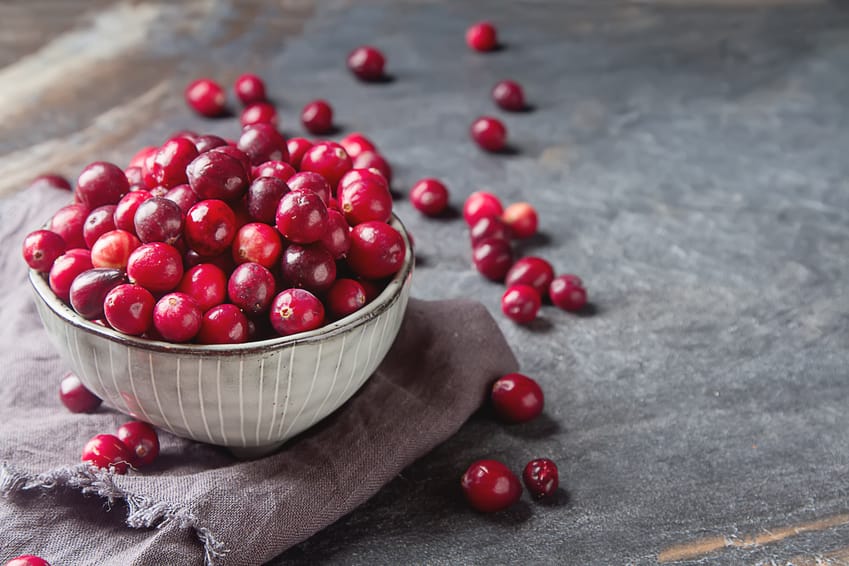 Fruit and Nut Clusters By Cathy Ireland, P.H.Ec. From The Vegetarian's Complete Quinoa Cookbook, Whitecap Books Ltd. 2012. Reprinted with permission. Some dinner parties just call for one decadent treat as the dessert. This is that dessert. Serve with tea or coffee and your company will rave. NOTE: You can find quinoa puffs in the cereal aisle in most high-end grocery stores or at a health food store. INGREDIENTS 6 oz (175g) bittersweet chocolate, coarsely chopped, 70%-75% coca mass. 1/2 cup (125 mL) quinoa puffs 1/2 cup (125 mL) dried cranberries 1/2 cup (125 mL) whole almonds, coarsely chopped METHOD 1. Line a large baking sheet (11"x17" / 28x42 cm) with parchment paper and set aside. Place the chocolate in a medium microwave-safe bowl. Microwave at medium for 1 minute, stir, microwave for one more minute at medium and stir again until completely melted. Depending in your wattage, this could take longer than 2 minutes. The trick is to add more time in 5-second intervals, as you don't want to scorch the chocolate. Stir until the chocolate has completely melted. 2. Add the quinoa puffs, cranberries and almonds. Stir to combine. 3. Drop 12 equal spoonfuls of the chocolate mixture on the prepared baking sheet. 4. Let set until firm, about 30 minutes, or refrigerate until firm. Store in fridge in an airtight container. Serve at room temperature. 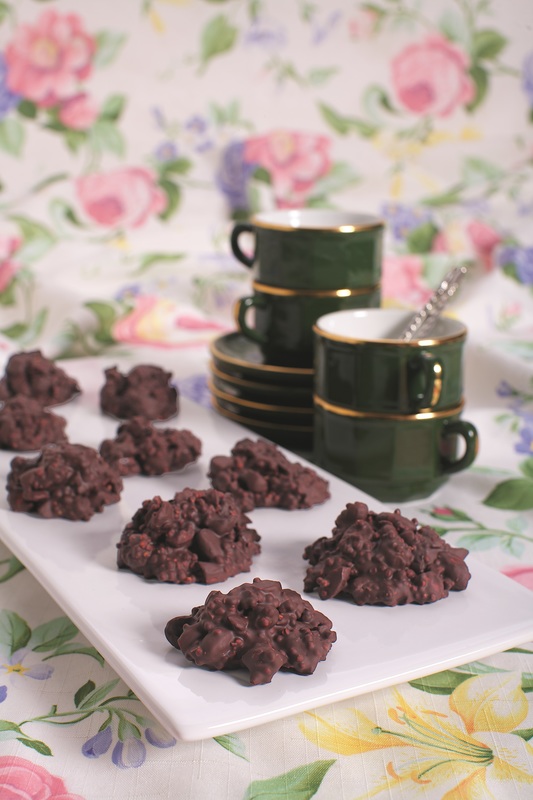 Brownies are a must in any cookbook worth its weight in chocolate, but healthy alternatives are always a challenge in the treat department. Enter Chocolate Black-Bean Brownies - a healthier twist on a classic favourite using heart-healthy natural cocoa powder and protein-rich black beans. Yes, black beans! Sshhh, don't tell, and no one will ever notice.
Recipe by Andrea Villneff, P.H.Ec., owner of Lime and Lemon Media Excerpted from The Vegetarian's Complete Quinoa Cookbook, by Mairlyn Smith. Reprinted with permission of Whitecap Books, 2012. INGREDIENTS 1 can (19 oz/540 mL) black beans, drained and rinsed 1 cup (250 mL) water 1 tsp (5 mL) pure vanilla extract 2 cups (500 mL) brown sugar, packed 1 1/2 cups (375 mL) quinoa flour 1 1/4 cups (310 mL) natural cocoa, sifted if lumpy 1 cup (250 mL) coarsely chopped walnuts (optional) 1 tsp (5 mL) baking powder 1 1/2 cups (375 mL) cooked quinoa made with water METHOD 1. Preheat the oven to 350F (175C). Lightly grease a 9x13 inch (3.5L) metal baking pan with canola oil. 2. In a food processor, pulse the beans. Slowly add the water to puree. Add the vanilla and pulse once or twice to combine. Set aside. 3. In a large bowl, mix together the brown sugar, quinoa flour, cocoa, walnuts (if using) and baking powder. Gently fold in the cooked quinoa. 4. Add the bean puree mixture. Stir well to combine. The batter will be very thick. 5. Spoon the batter into the prepared pan. Flatten the top with a spoon or spatula. Bake in the centre of the oven for 50 to 55 minutes, or until the centre is firm and a toothpick comes out clean. Remove from the oven and cool completely on a wire rack before cutting. Carefully cut exactly 16 squares and store in a covered container in a cool placer for up to 4 days. Makes 16 brownies. One serving = 1 brownie (without nuts) Nutrition per serving (without nuts) 219 calories 2 g total fat 0 g saturated fat 0 mg cholesterol 16 mg sodium 46 g carbohydrates 4 g fibre 27 g sugars 5 g protein Cranberry Maple Butter Tarts Sue Soderman, P.H.Ec. with Pat Moynihan Morris, P.H.Ec. and Olga Kaminskyj, P.H.Ec. Excerpted from Homegrown, by Mairlyn Smith. Reprinted with permission of Whitecap Books, 2015. “Butter tarts always bring back memories of holidays at our family cottage on Lake Huron in Grand Bend, Ontario. We could not arrive without a dozen gooey butter tarts that we bought on our way up. It didn’t matter if they got a little mushed during the trip, they still tasted just as good. This recipe is a tribute to that food memory, without the mushed up part.” --Sue INGREDIENTS Pastry 1 1/2 cups (375 mL) all-purpose flour 1/2 cup (125 mL) unsalted butter, softened 1/2 cup (125 mL) light cream cheese, softened Tart Filling 1/2 cup (125 mL) chopped dried cranberries 1/4 cup (60 mL) unsalted butter, softened 1/4 tsp (1 mL) iodized salt 1/2 cup (125 mL) lightly packed brown sugar 1 omega-3 egg 1/4 cup (60 mL) pure maple syrup 1/2 tsp (2 mL) pure vanilla extract METHOD A new spin on the quintessential Canadian tart renowned throughout the colonies. 1. Pulse together flour, butter and cream cheese in a food processor until mixture is well blended and starts to form a ball. Shape into ball with hands, then wrap tightly with plastic wrap. Refrigerate 1 hour or until chilled. 2. When the pastry is ready to roll out, preheat oven to 375ºF (190°C). 3. Place pastry on a lightly floured surface and roll out to 1/4-inch (6 mm) thickness. Cut into 12 rounds with a 4-inch (10 cm) cutter. Place rounds into a 12-muffin-cup pan and gently press into each muffin cup to line. Evenly divide the cranberries and place in the muffin cups. 4. In a large bowl, cream butter, add brown sugar and salt and beat in until smooth. Add egg and lightly beat until mixture is well blended and smooth. 5. Gently stir in maple syrup and vanilla until well incorporated. 6. Fill pastry cups three-quarters full with filling mixture. 7. Bake for 15 to 18 minutes until the filling is set and the pastry golden brown. Remove from oven and allow to cool in the pan before transferring tarts to a wire cooling rack. Makes 12 tarts One serving = 1 tart Per serving: 264 Calories, 14.6 g Total Fat, 8.8 g Saturated Fat, 0.7 g Trans Fat, 110 mg Sodium, 30.7 g Carbohydrate, 0.7 g Fibre, 17.3 g Sugars, 15.8 g Added Sugars, 3.5 g Protein Carbohydrate Choices: 2 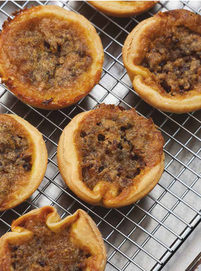 |

The Ontario Home Economics Association, a self-regulating body of professional Home Economists, promotes high professional standards among its members so that they may assist families and individuals to achieve and maintain a desirable quality of life. Categories
All
Archives
April 2024
|

 RSS Feed
|
Subscribe to our mailing list
|
|
Unsubscribe from our mailing list
|
Copyright © 2023 Ontario Home Economics Association (OHEA). All Rights Reserved.