|
Get started on holiday preparations by making delicious and colourful jars of a cranberry relish or chutney. Cranberries celebrate the season with their rich colour and bright taste and are easily turned into a welcome hostess gift or a treat for a special friend. Quick Apple Cranberry Chutney has a rich mellow taste and is perfect to serve with chicken or pork. The Cranberry Rum Relish is a splendid accompaniment to the holiday bird. Both of these require less than 15 minutes cooking time. A dollop of chutney on a cracker spread with cream cheese makes a superb appetizer requiring little preparation. And a bit of either the chutney or relish stirred into yogurt becomes a delicious low-fat veggie dip. Home preserving is easy and can be done safely if proper processing procedures and times are followed. It is essential to use mason-type jars. These jars are widely available in125 mL (1/2 cup), 236mL, 250 mL (1 cup) and 500 mL (2 cups) sizes which are perfect for creating small gifts. They often come with lids decorated in a holiday motif or, to personalize your gift, cut a circle of holiday fabric and tie it to the lid with ribbon and a card. One short evening spent now will provide you with several tasty gifts ready for holiday giving. QUICK APPLE CRANBERRY CHUTNEY 2 cups (500 mL) chopped cranberries 1 cup (250mL) finely chopped apple 1/2 cup (125mL) each: finely chopped red onion and sweet red pepper 1/2 cup (125 mL) cider vinegar 2 cloves garlic, minced 1 tbsp (15 mL) finely chopped gingerroot 1/2 cup (125 mL) packed brown sugar 1/4 tsp (1 mL) each: ground cumin and salt 1/8 tsp (0.5 mL) each: freshly ground pepper and hot pepper flakes 1. Combine cranberries, apple, onion, red pepper, vinegar, garlic and gingerroot in a stainless steel or enamel saucepan. Bring to a boil over high heat, reduce heat and boil gently, covered, for 5 minutes or until cranberries pop. 2. Add sugar, cumin, salt, pepper and hot pepper flakes. Cook for 5 minutes or until thickened. 3. Process 10 minutes for half-pint (250 mL) jars and 15 minutes for pint (500 mL) jars as directed below, or store in refrigerator up to 3 weeks. Makes 2 cups (500 mL). CRANBERRY RUM RELISH 1/3 cup (75mL) dark rum 1/4 cup (50 mL) finely chopped shallots Grated rind of 1 orange 3 cups (750 mL) fresh or frozen cranberries 1 cup (250 mL) granulated sugar 1/2 tsp (2 mL) freshly ground pepper 1. Combine rum, shallots and orange rind in a medium saucepan. Bring to a boil over high heat, reduce heat and simmer for a few minutes until rum has reduced and mixture is a syrupy glaze. 2. Add cranberries and sugar. Stirring constantly, continue to cook until cranberries pop and sugar is dissolved. Remove from heat and stir in pepper. 3. Process for 10 minutes for half-pint (250 mL) jars and 15 minutes for pint (500 mL) jars as directed below, or store in refrigerator up to 3 weeks. Makes 2 cups (500 mL) TO PROCESS CHUTNEY OR RELISH: 1. Before beginning recipe, partially fill a boiling water canner with hot water. Place required number of clean mason jars in canner and bring water to a boil. Meanwhile, place snap lids in hot water according to lid manufacturer’s directions. 2. When recipe is finished, remove jars from canner and ladle chutney or relish into jars to within 1/2-inch (1 cm) of top rim (head space ). Wipe jar rim to remove any stickiness. Centre snap lid on jar; apply screw band just until fingertip tight. Place jars in canner and adjust water level to cover jars by 1-2 inches (2.5-5 cm). Cover canner and return water to boil over high heat. Begin timing when water returns to a boil and process for amount of time as directed in recipe. Water should be kept at a steady boil during processing time. 3. At end of processing time, remove jars from canner and cool for 24 hours. Check jar seals to ensure the lids turn downward indicating a tight seal. (Any jars with unsealed lids may be kept in the refrigerator for up to three weeks.) With a properly sealed snap lid, the screw ring can be safely removed, dried and replaced to prevent rusting during storage. Label jars and store in a cool, dark place ready for holiday giving. Recipes adapted from The Complete Book of Year-Round Small-Batch Preserving by Ellie Topp, P.H.Ec. and Margaret Howard, RD, P.H.Ec. (Firefly 2001). Ellie Topp is a Professional Home Economist and certified culinary professional. She is co-author of several cookbooks, including Preserving Made Easy, The Complete Book of Year-Round Small Batch Preserving and Savoury Wisdom: Delicious Recipes for Two. 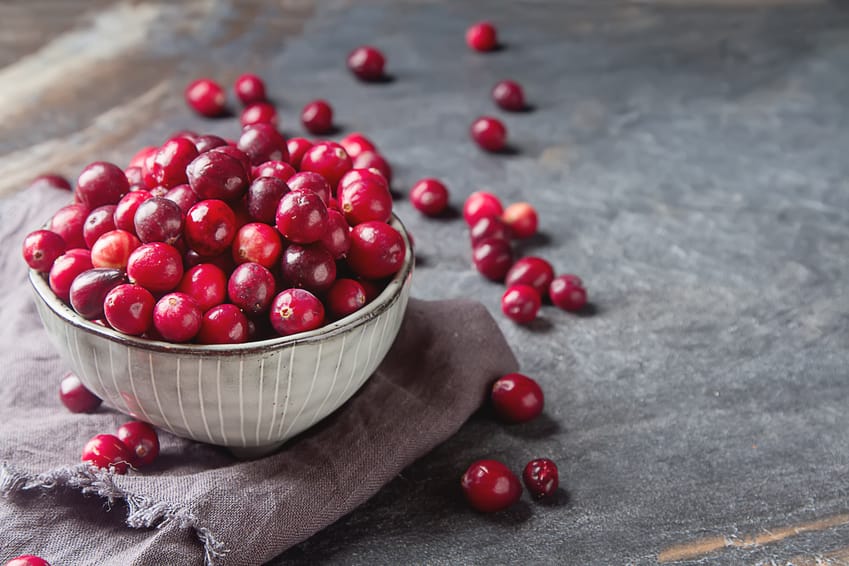
0 Comments
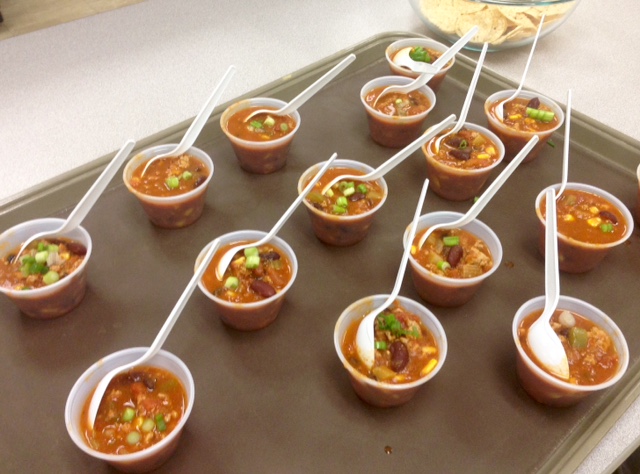
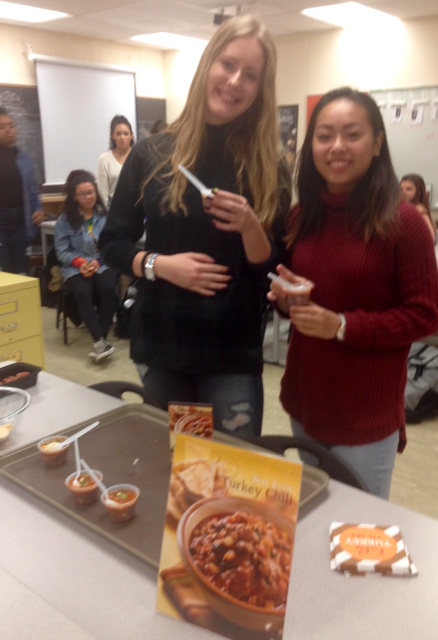
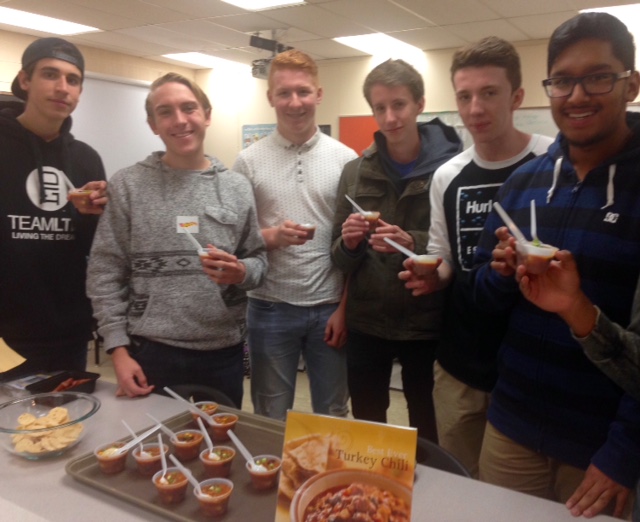
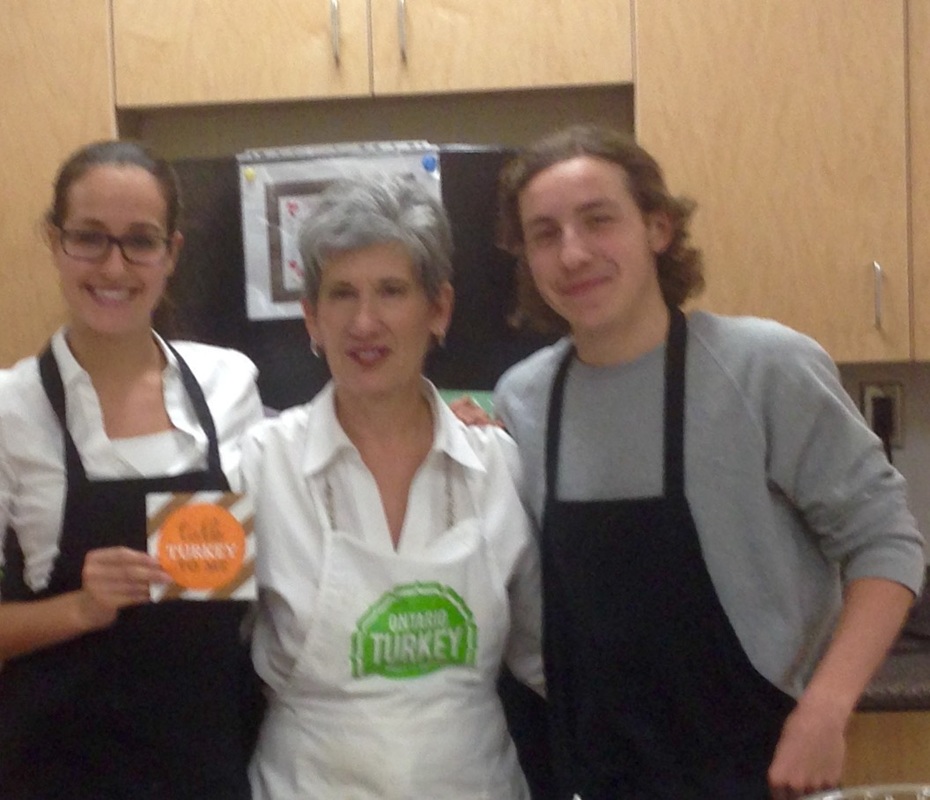
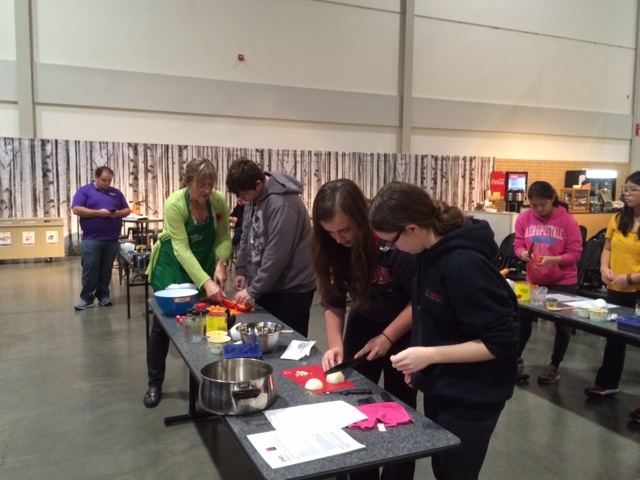
OHEA member Pat Moynihan Morris, P.H.Ec., was at Cawthra Park Secondary School in Mississauga teaching Grade 12 students how to make a delicious turkey chili. Thanks to Ontario Turkey, these students are well on their way to achieving 6 by 16! (www.sixbysixteen.me). For more turkey recipes, please visit the Ontario Turkey website here. OHEA was invited by the St. Elizabeth A. Seton School Parent Council, in the Ottawa area, to present ideas for healthy school lunch options to parents at their Parent Engagement Workshop on November 16th. Lucky for us, Mary Carver, P.H.Ec, and Linda Reasbeck, P.H.Ec., both from the Ottawa Home Economics Association (and OHEA) volunteered to help.  Mary covered food literacy, the online OHEA petition, status of Canada's Food Guide, tips/tricks for lunches, information about OHEA, where to find credible nutrition information, getting kids in the kitchen to cook real food. This was followed by a Question and Answer period. Linda had a hands-on exhibit with samples of lunch containers, healthy mini-muffins to sample, fruit and veggie kabobs, hard-cooked eggs, lean meat, whole grains etc. and presented with the help of a capable and keen male student - it was great fun. Emphasis was on healthy, quick to assemble, fun and colourful real food that kids will eat – not discard. Minimizing salt, sugar, fat and and overly processed foods. Handouts included:
 A big thank you to Mary Carver, P.H.Ec., and Linda Reasbeck, P.H.Ec., for making this such a successful event. Information submitted by Mary Carver, P.H.Ec.
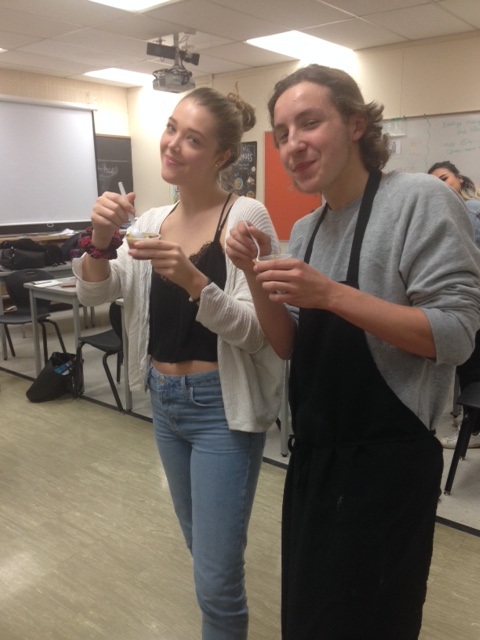
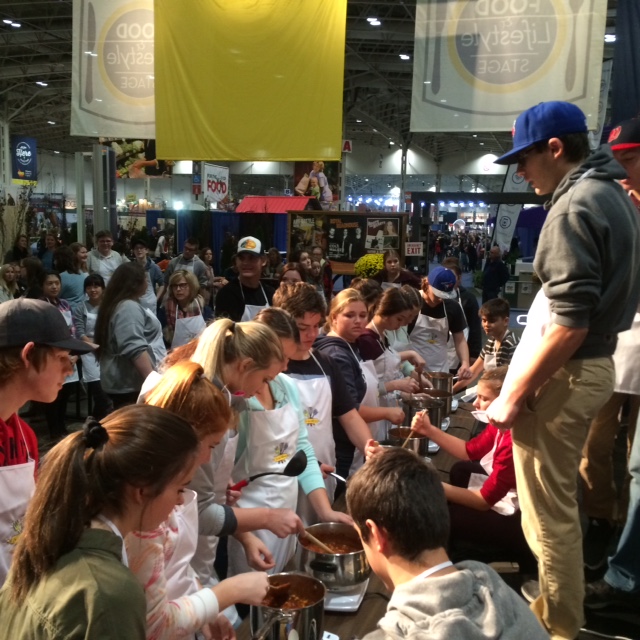
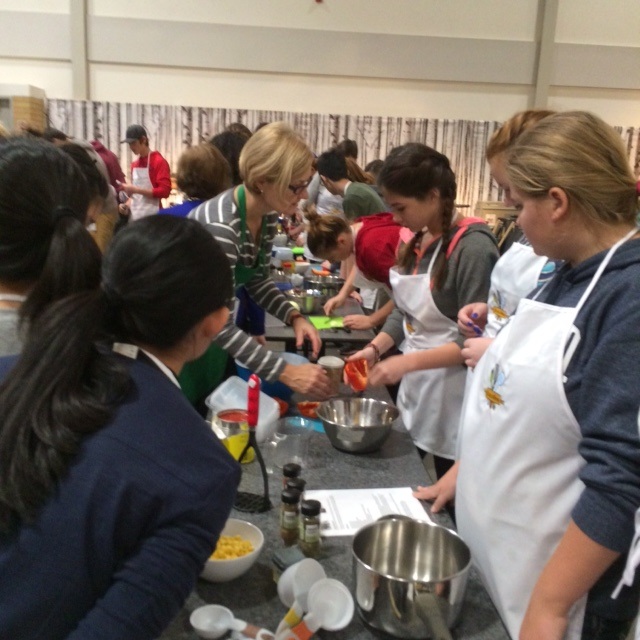
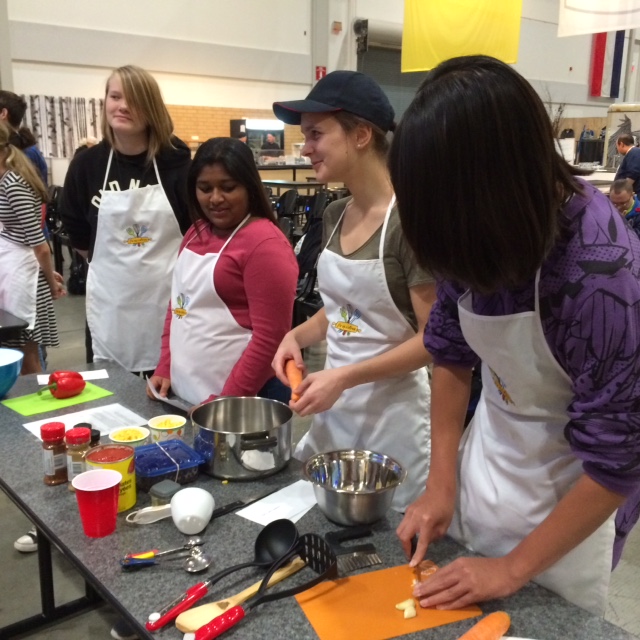
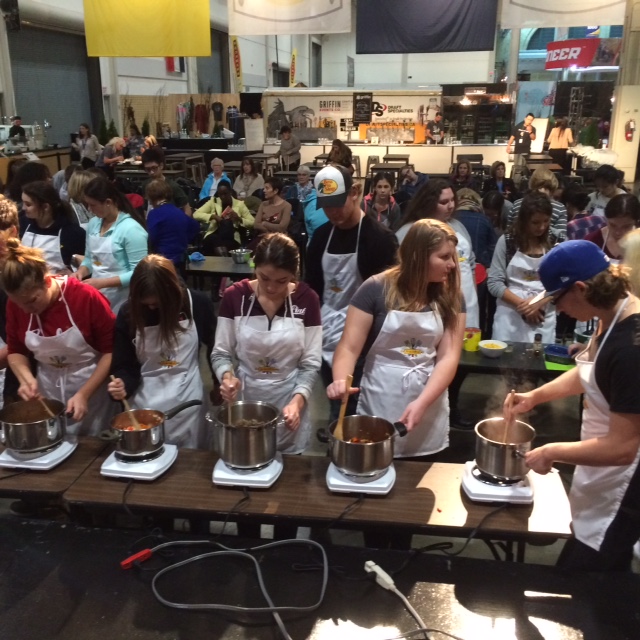
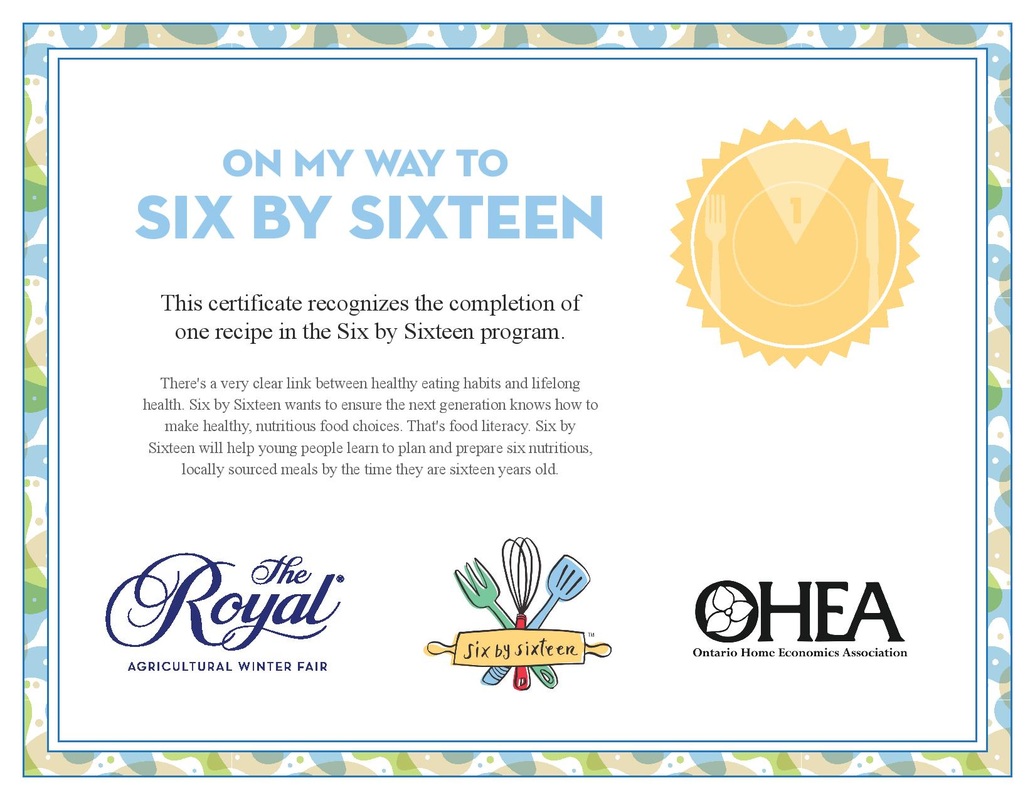
We were given a fantastic opportunity to teach Six by Sixteen cooking classes at the Royal Winter Fair, on November 8th and 9th. Over 100 students from 3 different schools came to learn some essential cooking skills, and cook Chipotle Black Bean Chile, from our cookbook, Homegrown. The students came eager to learn, and not only learned new skills, but took home their finished product. A big thank you goes out to our OHEA volunteers: Andrea Leisner, P.H.Ec., Ilona Maziarczyk, P.H.Ec., Jan Main, P.H.Ec., Tiina Tralman, RD, P.H.Ec., Rachel Johnstone, P.H.Ec., and Barbara Weese, P.H.Ec. We were joined by Teacher Ambassadors from AgScape, who spoke about some of the local ingredients in the chili. All students who attended left with a Certificate of Completion from OHEA and Six By Sixteen, as well as a Six by Sixteen apron. The Ontario Home Economics Association (OHEA), in partnership with the Ontario Federation of Agriculture’s (OFA) Six by Sixteen food literacy program and AgScape™ (the voice of Agriculture in the Classroom Ontario), are pleased to be hosting a series of hands-on cooking classes for Ontario secondary school students at the upcoming Royal Agricultural Winter Fair, on November 8-9, 2016, at Exhibition Place, Toronto, Ontario, on the Burnbrae Farms Food & Lifestyle Stage. Basic food preparation skills and the ability to prepare healthful meals from scratch, while also incorporating local ingredients, are fundamental to the health of our youth and our agriculture system. Sadly today, culinary skills are rarely passed down from previous generations and processed foods and fast foods frequently replace basic, nutritious, home-cooked meals. Teaching Ontario youth to make nutritious food choices incorporating local ingredients, and giving them hands-on kitchen skills to create meals from scratch, prepares them to lead healthy, independent lives. Cooking classes will feature a hearty and nutritious recipe from OHEA’s latest cookbook Homegrown – Celebrating the Canadian Foods We Grow, Raise and Produce – currently shortlisted for the Taste Canada Awards and edited by award-winning cookbook author and TV personality Mairlyn Smith, P.H.Ec. OHEA is a self-regulated body of professional Home Economists that promotes high professional standards among its members so that they may assist families and individuals to achieve and maintain a desirable quality of life. OHEA supports all efforts to improve food literacy in Ontario through advocacy, outreach and partnerships. The Six by Sixteen food literacy program is an initiative by the Ontario Federation of Agriculture to help young people learn to plan and prepare six nutritious, locally sourced meals by the time they are sixteen years old. AgScape™ is dedicated to enhancing the learning experiences of students by providing high quality, objective and curriculum-linked agriculture and food related learning materials and professional consultative service to Ontario educators. For further information, please contact: media@ohea.on.ca Spiced Ambercup Squash Soup with Maple Syrup Excerpted from Homegrown, by Mairlyn Smith. Reprinted with permission of Whitecap Books, 2015. By Jennifer Goodwin, P.H.Ec. This deep orange coloured soup has the best of both flavour-note worlds; it’s a little bit spicy and a little bit sweet. It was a huge hit the day we tested it, and the flavours are well worth the work it takes to hack open the squash. INGREDIENTS One 3 lb (1.4 kg) ambercup squash (see note) 3 Tbsp (45 mL) canola oil, divided 1 large onion, chopped 3 cloves garlic, minced 3 cups (750 mL) no salt added vegetable broth 1 Empire apple, peeled, cored and chopped 1 tsp (5 mL) grated fresh ginger (see note) 1 tsp (5 mL) Madras curry powder 1/2 tsp (2 mL) cinnamon 1/4 tsp (1 mL) nutmeg, freshly grated 1/2 tsp (2 mL) iodized salt 1/4 tsp (1 mL) freshly ground black pepper 1–2 Tbsp (15–30 mL) amber or dark pure maple syrup 2 cups (500 mL) skim milk 1/8–1/4 tsp (0.5–1 mL) green Tabasco sauce 16 chives, for garnish (optional) METHOD 1. Preheat oven to 375°F (190°C). With a large sturdy knife, cut the squash in half and remove seeds and pulp. Peel and dice into 1-inch (2.5 cm) chunks; place into a large roasting pan. Drizzle with 1 1/2 Tbsp (22 mL) oil and toss to coat. Roast for 45 minutes or until the squash is soft and beginning to brown slightly. Toss occasionally throughout the roasting process to prevent burning. 2. When the squash is cooked, heat a large saucepan over medium heat. Add the rest of the oil plus the onion and garlic, sauteing until soft and slightly browned, about 5 to 7 minutes. Remove from heat and add the squash. 3. Place the empty roasting pan on a separate element over medium heat and pour in broth. Once the liquid begins to boil, reduce to simmer, scrapping up any bits for added flavour. Pour into the large saucepan. 4. Add apple, ginger, curry, cinnamon, nutmeg, salt and pepper. Return to heat and bring to a gentle boil; reduce heat, cover and simmer until the apple is soft, about 15 minutes. 5. Add maple syrup, milk and Tabasco and stir in well. Remove from heat. Using a hand held immersion blender, puree the soup OR transfer to a blender or food processor and puree in smaller batches and return soup to saucepan. Garnish with whole chives if desired. See picture. 6. Reheat if necessary; serve or store in the fridge for up to two days. Freeze any leftovers up to three months. Makes 8 cups (2 L) One serving = 1 cup (250 mL) Per serving: 176 Calories, 5.7 g Total Fat, 0.5 g Saturated Fat, 0 g Trans Fat, 202 mg Sodium, 31 g Carbohydrate, 4 g Fibre, 13 g Sugars, 1.5 g Added Sugars, 4.3 g Protein Carbohydrate Choices: 2 Madras Curry Powder In traditional South Asian cuisine, a curry is a dish cooked in a sauce. To most Canadians however, a curry is a powder that you add to a dish to give it heat. Curry powders are created by blending many spices together, and blends of curry powders range from spicy to very spicy, depending on what area that curry blend was created. Sweating cools you down, so areas that are very hot tend to have curry blends that produce sweating. Madras is an area in India that is very hot, hence this blend is fairly spicy. Ingredient Note: Ambercup Squash-- Ambercup squash is a deep orange squash that looks like its cousin the buttercup squash. Its flesh is darker in colour and slightly sweeter in flavour. Can’t find an Ambercup? Buttercup (or their more distant cousin Butternut) will also work for this recipe. Ginger—Peel ginger using the bowl of a spoon, holding the stalk of the spoon and then dragging it down the sides of the ginger; wrap and store any leftover ginger in the freezer. Grate into recipes as needed. PHEc Tip: This soup may be quite thick depending on the type and age of the squash. Add more broth, water or milk until you reach desired thickness. 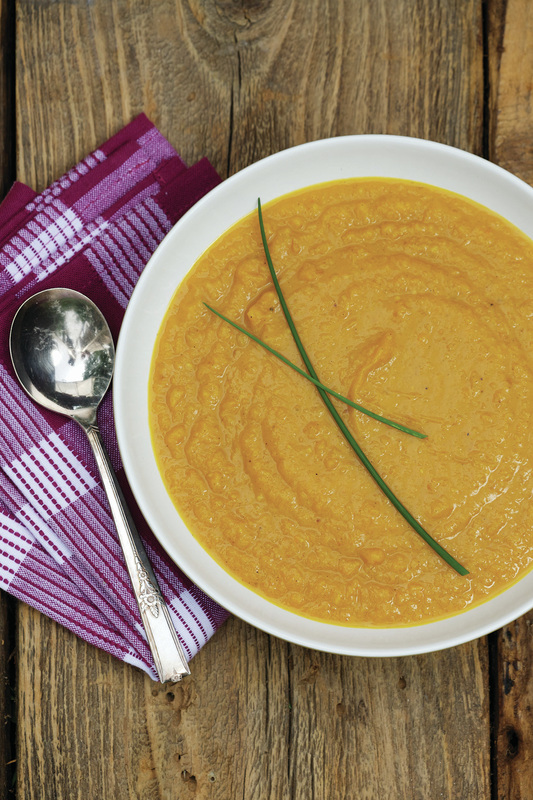 Whole Wheat Seed Bread Jan Main, PHEc Excerpted from Homegrown, by Mairlyn Smith. Reprinted with permission of Whitecap Books, 2015. “This wholesome loaf is a perfect accompaniment to soups and salads, not to mention freshly made preserves in the summer.” —Jan INGREDIENTS 3 cups (750 L) lukewarm water (approx. 100°F/38°C) 2 Tbsp (30 mL) traditional active yeast 2 tsp (10 mL) granulated sugar 1/3 cup (75 mL) liquid honey 1/4 cup (60 mL) canola oil 1 cup (250 mL) natural bran or wheat germ (see note) 1 cup (250 mL) quick oats 3/4 cup (175 mL) sunflower seeds 1 Tbsp (15 mL) iodized salt (see note) 6 cups (1.5 L) whole wheat flour (approx.) Additional oats or seeds to pat onto surface METHOD 1. Lightly oil two 9- × 5-inch (2 L) loaf pans or line with wet parchment paper, well wrung out (see p. 388). Set aside. 2. Rinse a very large mixing bowl with hot water to warm it up, then add the lukewarm water. 3. Sprinkle yeast and sugar over the water. Let stand about 10 minutes or until yeast becomes frothy. 4. Whisk in honey, oil, bran (or wheat germ), oats, sunflower seeds and salt (do not omit!). Using a wooden spoon, beat in flour 1 cup(250 mL) at a time, making sure you beat until the batter is smooth before adding more flour. When all the flour has been added, beat vigorously until well blended. Dough will be heavy and moist. 5. Divide dough in half and pat into the prepared pans. Sprinkle unbaked loaves with additional quick oats and sunflower seeds, pressing into the surface of each loaf. Cover loaves with a clean tea towel and let stand in a warm place for about 45 minutes or until risen. Note: this is a heavy bread so it won’t rise as high as a regular yeast bread. 6. About 5 minutes before the dough has risen, preheat oven to 375°F (190°C). Bake loaves for 40 to 45 minutes or until a deep golden brown. Loaves should produce a hollow sound when tapped. 7. Cool loaves on racks for 10 minutes before removing from pans. Cool completely before storing. Makes two 9-inch (2 L) loaves, 16 slices per loaf One serving = 1 slice Per serving: 147 Calories, 3.4 g Total Fat, 0.6 g Saturated Fat, 0 g Trans Fat, 297 mg Sodium, 24g Carbohydrate, 3.4 g Fibre, 6.8 g Sugars, 6 g Added Sugars, 7.4 g Protein, Carbohydrate Choices: 1 1/2 Want to make yeast breads but feel slightly intimidated by the cycle of kneading, waiting for the yeast to rise, and then kneading again? Batter breads to the rescue! Batter breads only rise once and don’t require a lot of kneading, but they still provide the same great yeast bread taste. Are you eating your Iodine? Iodine is an important trace mineral whose main function is to help the thyroid gland make thyroid hormones. Thyroid hormones are secreted into the blood and then carried to every tissue in the body. They help the body use energy, stay warm and they keep the brain, heart, muscles and other organs working on an even keel. The average Canadian adult requires 150 mcg per day. Without enough iodine you can develop a goiter, an enlargement of the thyroid gland that was common in Canada until the 1920’s when iodine was added to regular table salt. The best sources of iodine are found naturally in seafood and seaweed, as well as in dairy products. Smaller amounts are found in beans, eggs and whole grains. It is uncommon to develop an iodine deficiency if you are eating seafood on a regular basis, or if you regularly ingest seaweed, beans, dairy products, whole grains or eggs. In my experience, however, I have noticed that a large percentage of Canadians do not eat seafood on a regular basis (two to three times a week). Factor in diets that limit dairy products or people who avoid eating whole grains, beans and eggs, and I believe we have the makings of a perfect iodine deficiency storm. The recipes in this book are low to very low in sodium, but at least they aren’t low in iodine. Your taste buds may tell you that recipes need more salt, but before you start waving a salt shaker around like a fairy wand, bear in mind that 1/4 tsp (1 mL) iodized salt has 428 mg of sodium and 95 mcg of iodine. Note: To make sure that you are getting enough iodine, eat a well-balanced diet. Do not take an iodine supplement as it can interfere with other medications, and too much iodine is just as bad as too little. Check with your doctor is you think you might have an iodine deficiency. Ingredient Note : Iodized Salt—Salt has an important function in yeast development, so don’t omit it! Natural Bran/Wheat Germ— To make this a whole grain bread use 1/2 cup (125 mL) wheat germ and 1/2 cup (125 mL) natural bran. PHEC Tips: Bread may be served warm from the oven but needs to be cut into thick slices. It slices more easily if cooled.  Waste Less ~ Enjoy More Fresh Produce By Teresa Makarewicz, P.H.Ec. It’s a fact! Canadians waste food – especially fresh produce. With careful planning, and proper storage, families can save money and time and always have nutritious produce on hand for quick and healthful meals. Tips to Reduce Waste, Save Money and Enjoy More Produce
Some Fruits and Vegetables Need Special Attention
Make a nutritious pot of soup to use-up veggies and to avoid waste. Vegetable Garden Soup This flavourful, nutrient-packed soup served with a thick slice of whole grain bread is sure to satisfy. 8 cups (2 L) ‘low-sodium’ chicken or vegetable broth 2 large baking or yellow-fleshed potatoes, peeled and diced (about 3 cups/750 mL) 2 leeks, white and light green parts only, thinly sliced 2 cups (500 mL) thinly sliced green cabbage 2 cups (500 mL) small cauliflower florets 3 carrots, sliced 2 stalks celery, sliced 1 bay leaf 1 can (19 oz/540 mL) white kidney beans, drained and rinsed 1/3 cup (75 mL) each, chopped fresh dill and fresh parsley 1/4 tsp (1 mL) freshly ground pepper Salt to taste In a large pot, combine broth, potatoes and leeks. Cover and bring to boil over high heat. Add cabbage, cauliflower, carrots, celery and bay leaf. Cover and return to boil. Reduce heat to medium-low. Simmer gently for 20 minutes or until vegetables are tender-crisp. Add beans, dill, parsley, pepper and salt to taste. Simmer, uncovered for 10 minutes or until beans are heated through. Remove bay leaf and serve. To store, let cool for 30 minutes; refrigerate, uncovered, in a shallow container until cold. Cover and refrigerate for up to 3 days. Reheat slowly. Makes 8 -10 servings. Helpful Hints: Substitute kidney beans with 2 cups (500 mL) frozen lima beans. Fresh herbs are a must in this recipe and can be increased to suit your taste. No leeks? No worries. Use 1 cup (250 mL) chopped shallots or cooking onion. Teresa Makarewicz, P.H.Ec. is an Ancaster-based Professional Home Economist and owner of Foodgroups Consulting. An expert in recipe development, testing, food styling and media presentations, Teresa has focused much of her food and nutrition career teaching consumers how to use local produce. She is a member of the Ontario Home Economics Association. 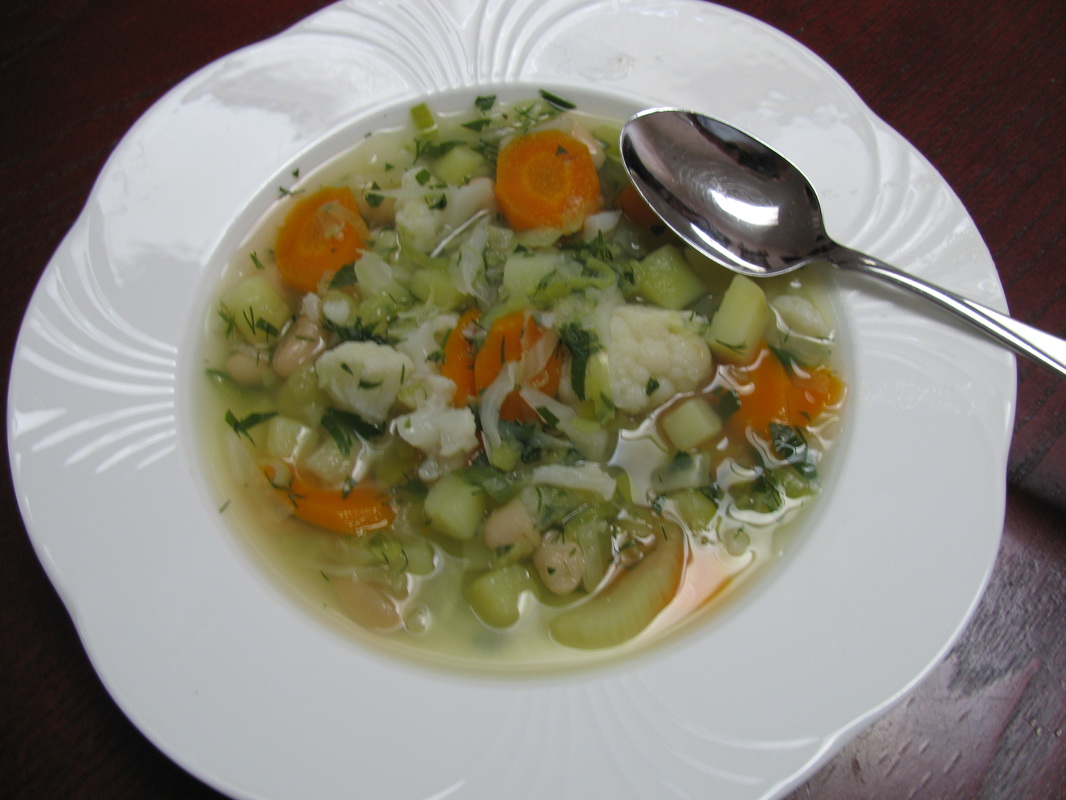 Back-to-class or back-to-work spells back to lunch box planning amid news of rising food prices. Here are some tips for a home-made lunch to save money, reduce waste and boost nutrition:
Maria Depenweiller, P.H.Ec. is a Milton-based Professional Home Economist and member of the Ontario Home Economics Association. 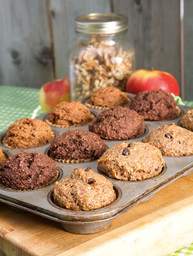 With the new school year just around the corner, it's time to start thinking about school lunches again. Here are some great tips from OHEA member Mairlyn Smith, P.H.Ec
Tips for Packing Healthy lunches: 1. Choose a lunch that includes whole grains, lean protein, vegetables and fruit, and foods that contain calcium like dairy foods.
2. Tuck in a healthy treat such as a homemade muffin using whole grains. Try baking mini muffins for mini appetites. Many children like/need a snack at recess. When you bake a batch of muffins, wrap some individually and freeze them for quick lunch additions, or buy ready-made low-fat muffins such as bran or oatmeal and raisin. 3. Provide plenty to drink. Students who are dehydrated lose their ability to think and learn and can often be very distracted. Pack two or three drinks, if possible. Make it water for snacks and milk or a milk substitute for their lunch. (Tip: if using rice, nut or soy beverages as a milk substitute make sure you teach your kids to shake the container before they open it, the calcium that is added tends to stick to the bottom of the container) 4. Add lots of variety, so that lunches do not become predictable and boring. 5. Keep cold foods cold and hot food hot for safety. Use an insulated lunch bag with frozen 100% juice, milk or milk substitutes in Tetra Pak® containers to keep it cold. A wide-mouth thermos will hold a hot soup until lunch. Keep an assortment of baggies on hand for ease of wrapping. 6. Watch for school rules regarding the use of peanut butter due to allergies. 7. Avoid too many sweets and high fat foods as they add calories but often little food value. A child can experience fatigue sooner when a diet is too high in sugar. When packing juice, make sure it is 100% juice and only one serving of juice per day. 8. Make your own "trail mix" with dried cranberries, raisins or other dried fruits, and just a few mini chocolate chips or mini M&M’s for a hint of chocolate OR buy an already prepared mix and add some of the above favourites. Use the snack-size zip locks to tuck in this fibre-rich treat. Double-Chocolate Pumpkin Muffins Excerpted from Healthy Starts Here!, by Mairlyn Smith. Reprinted with permission of Whitecap Books, 2011 Next time you have to send a treat to school, pack up these muffins and tell your kids they’re chocolate cupcakes — they taste that good. Sometimes when you tell a kid there’s pumpkin in something they just won’t eat it, so I give you permission to omit that minor detail. (If you’re sending these muffins to school, check the chocolate chips’ label for any mention of peanuts, in case of allergies.) Makes 12 muffins | One serving = 1 muffin Ingredients 1 cup (250 mL) packed dark brown sugar 1 cup (250 mL) buttermilk 1 cup (250 mL) pure pumpkin purée (not pumpkin-pie filling; see page 16) 1/2 cup (125 mL) oat bran 1 omega-3 egg (see page 13) 1 cup (250 mL) whole wheat flour 3/4 cup (185 mL) ground flaxseed (see page 13) 1/2 cup (125 mL) natural cocoa powder (see page 12) 1/4 cup (60 mL) chocolate chips with at least 60% cocoa mass or chocolate chunks with at least 70% cocoa mass 2 tbsp (30 mL) wheat germ 2 tbsp (30 mL) cinnamon 1 1/2 tsp (7.5 mL) baking powder 1 tsp (5 mL) baking soda Preheat the oven to 400°F (200°C). Line a 12-cup muffin pan with paper liners. Whisk together the brown sugar, buttermilk, pumpkin, oat bran, and egg in a medium bowl. Set aside. Whisk together the flour, flaxseed, cocoa, chocolate chips, wheat germ, cinnamon, baking powder, and baking soda in a large bowl. Add the sugar / pumpkin mixture to the flour mixture and mix until just combined. Divide the batter evenly among the muffin cups (I use a 1/4-cup / 60 mL ice-cream scoop with a release lever). Bake until a toothpick comes out clean, 20 to 25 minutes. Let the muffins cool in the pan on a wire rack for 5 minutes. Remove the muffins and let them cool completely on the wire rack. (Store the muffins in an airtight container for up to 2 days, or freeze for up to 2 months.) Per muffin: 190 calories, 4.6 g total fat, 1 g saturated fat, 0 g trans fat, 183 mg sodium, 35.6 g carbohydrate, 5 g fibre, 18.4 g sugars, 5 g protein Diabetes Food Choice Values per muffin: 2 Carbohydrate, 1 Fat Pumpkin 101 Aside from making scary jacko’-lanterns, pumpkins are a storehouse of nutrients, but only the ones that are too small for lanterns are good for eating. |

The Ontario Home Economics Association, a self-regulating body of professional Home Economists, promotes high professional standards among its members so that they may assist families and individuals to achieve and maintain a desirable quality of life. Categories
All
Archives
December 2023
|


 RSS Feed
|
Subscribe to our mailing list
|
|
Unsubscribe from our mailing list
|
Copyright © 2023 Ontario Home Economics Association (OHEA). All Rights Reserved.